


The radius of curvature describes the local curvature of an edge, a chamfered edge, or a curved surface. In the practice of concrete demolition and deconstruction, gutting works, rock excavation, and tunnel construction, it decisively influences how cutting, gripping, and splitting processes behave. A suitable radius of curvature determines whether concrete demolition shear can seat over an area, whether stone and concrete splitting devices can initiate cracks in a controlled manner, and how safely cuts can be started on pipes, vaults, or tanks. Those who know and correctly assess radii reduce notch effects, minimize uncontrolled spalling, and make workflows predictable.
Definition: What is meant by radius of curvature
The radius of curvature R is the radius of the conceptual osculating circle (tangent circle) that best approximates a curve at a point. The smaller R is, the stronger the curvature; the curvature κ is the reciprocal of R (κ = 1/R). For surfaces, one distinguishes principal curvatures (concave/convex), whose smallest radius dominates the local behavior. In day-to-day demolition, this particularly concerns pipe and shell geometries, vaults, cones, radii at foundation edges, fillets, as well as irregular fracture edges where tools are applied or forces are introduced.
Geometric fundamentals and calculation of the radius of curvature
In the simplest case (circle, pipe), the radius of curvature is identical to the known radius of the round shape. For general contours, R can be described locally as the ratio of the tangent’s length and direction change. Practically relevant are: the inner radius (concave), the outer radius (convex), the mean radius of curvature in hollow bodies (e.g., pipe mid-thickness), and the effective seating radius, which results from the contact between the tool jaw and the component. For a jobsite approximation, R can be determined from three points on a curve; the closer the points, the better the local approximation. It is important to clearly distinguish between the component radius and the edge chamfer, because chamfers increase the effective seating area for tool jaws without changing the component’s curvature.
Simple methods on site
- Place a radius gauge or flexible profile gauge and compare with a known template.
- Vernier caliper, folding rule, or tape measure: Determine the diameter on pipes; R is half of Ø.
- Bevel gauge/string method: Capture a curve segment, interpret it as a circular arc, measure arc length and chord; from this, estimate R roughly.
- Apply a cardboard or wooden template with different radii and check for the best seating contact.
- Quick photogrammetry with a scale (orientation only, not a reliable survey).
Digital methods
For complex geometries (e.g., doubly curved shells, irregular vaults), total station surveying, 3D scanners, or point-cloud evaluations deliver reliable radius fields. The evaluation should focus on the tool seating situation (contact zones), because this is where the effective radius of curvature for gripping, cutting, and splitting is decisive.
Significance in concrete demolition and specialized deconstruction
The radius of curvature governs bearing contact areas, grip security, and crack propagation. Small radii produce high stress gradients and notch effects that can lead to uncontrolled breakouts. Large radii distribute forces more favorably but often demand larger jaw openings or modified approach angles.
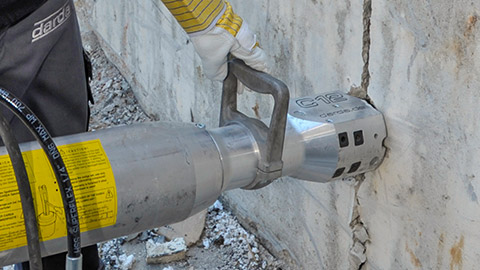
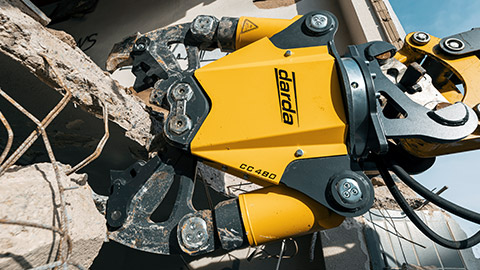
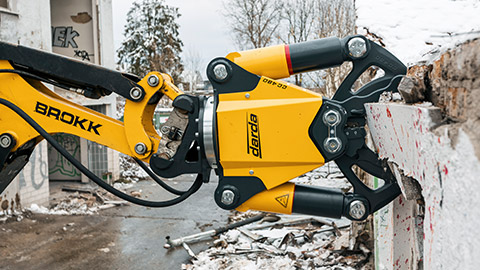
Concrete demolition shear: grip position, minimum seating area, and crack path
- Gripping on curved surfaces: For pipes, columns, or vaults, a sufficiently large, non-slip seating area is essential. If the radius is too small, contact zones remain point-like; slipping or edge crushing is more likely.
- Cut guidance: On convex radii, cracks tend to wander laterally; a preceding relief cut or a notch can steer crack initiation.
- Influence of rebar: Rebar usually follows larger bending radii than the concrete’s outer contour; during a shear cut, steel stress may release and cause springback. A point of application with a larger local R reduces sudden releases.
Stone and concrete splitting devices: borehole rows and split lines
- Place boreholes along the planned split line at uniform spacings; shorten spacings in regions with small radii of curvature to support the crack front.
- Align split wedges or split cylinders so the resulting splitting force is as perpendicular as possible to the local tangent. Small radii often require smaller, more closely spaced tools.
- Convex geometries favor tearing outward; on concave inner radii, the crack front may stall. If necessary, provide auxiliary cuts or additional borehole rows.
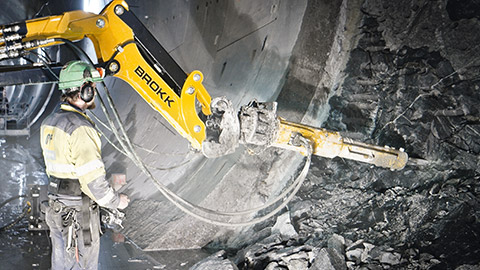
Radius of curvature in rock excavation and tunneling
Vault profiles, fillets at crown and invert, and curved support arches define the curvature situation. Smaller radii concentrate stresses and change crack propagation in rock. For split cylinders in rock (e.g., rock splitters), drilling pattern, center spacing, and orientation must be adapted to the local curvature to avoid overbreak and to produce the profile true to dimension.
Drilling patterns on curved profiles
- Reduce drilling spacings in convex crown areas and stage the splitting sequence in a low-stress manner.
- In concave haunches, relieve locked-in stresses, e.g., with pre-relief cuts, to prevent tools from binding.
- Irregular natural curvatures require continuous control; radii often vary over short distances.
Influence on strip-out and cutting
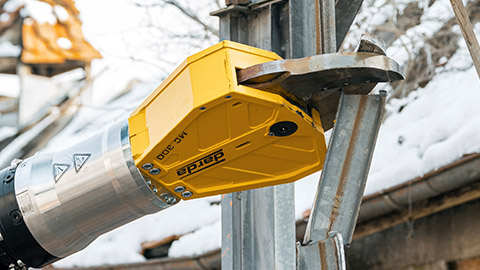
During strip-out works, tools frequently encounter hollow bodies, shafts, service pipes, and vessels with curved shell surfaces. Steel shear and multi-cutters need adequate seating contact to safely introduce shear forces into curved profiles, especially when using multi cutters for curved profiles. Tank cutters benefit from larger radii because plate shells are less prone to local buckling there; with small radii, the risk of the material buckling increases. A suitable starting point with a larger radius and a controlled cutting sequence reduce undesired deformations.
Material behavior, notch effect, and crack control
Radii of curvature determine how stresses concentrate. The smaller the radius, the greater the notch effect. In concrete, reinforced concrete, natural stone, and steel, this leads to different fracture and deformation behaviors that influence the choice of tool, cut sequence, and load application direction.
Concrete and reinforced concrete
- Convex outer radii at edges promote spalling; a preceding relief cut reduces edge breakouts during shear cuts.
- Concave inner radii (e.g., at joints) arrest cracks; additional splitting starts or auxiliary drillings are useful there.
- Rebar can deflect crack paths; the application point for the concrete demolition shear should be chosen so that rebar cuts occur along larger local radii to mitigate uncontrolled releases.
Natural stone
- Splitting behavior often follows bedding and joint properties more strongly than geometry; small radii still increase the risk of spalling outside the target contour.
- In natural-stone extraction, split cylinders combined with tightly guided borehole rows enable more precise crack control along curved contours.
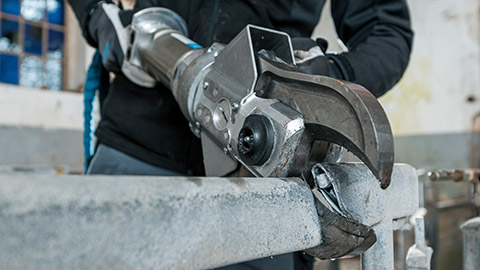
Steel and sheet metal
- Small inner radii increase local stretching during shearing; controlled cut sequence and feed reduce edge bulging.
- In pipes, a larger seating radius leads to more stable shearing conditions, especially for thin-walled sections.
Tool selection and approach angle depending on the radius of curvature
The tool geometry should match the component’s curvature. Key parameters include opening width, jaw shape, blade length, pointed or rounded profile, and the orientation of force lines. With concrete demolition shear, a seating position adapted to the curvature improves area contact. With stone and concrete splitting devices, slender wedges or smaller cylinders are often advantageous in areas with tight radii because they initiate the split line closer to the target contour.
Approach angle
- At convex outer radii, choose a flatter approach angle to avoid lateral breakouts.
- At concave inner radii, keep the force application steeper to drive the crack front out of the haunch.
- With varying radii, adjust the application step by step and monitor crack development.
Planning, safety, and execution notes
Assessing the radius of curvature is part of careful work preparation. This includes selecting suitable tools, defining cutting and splitting sequences, and safeguarding against uncontrolled component movements. Legal and safety requirements must always be observed in accordance with recognized rules of engineering practice and the applicable regulations; in case of doubt, an object-specific assessment should be carried out.
- Check contact surfaces: Is the local radius sufficient for non-slip seating? If necessary, use shims.
- Pre-relief: Plan relief cuts or relief boreholes at small radii to mitigate notch effects.
- Adapt drilling patterns: In strongly curved zones, reduce spacings and deploy smaller tools in stages.
- Crack monitoring: Visual inspection after each step; geometry and radius can change due to material redistribution.
- Stability: Curved components (vaults, pipes) can form new load paths after partial dismantling; provide temporary supports.
Typical application examples
- Concrete pipelines: Large outer radius, small inner radius – shear cut on the outer contour with a relief cut, splitters inside with a tighter borehole sequence.
- Vaulted slabs during deconstruction: Curvature determines the order of cuts; first release edge areas with larger radii, then the crown.
- Foundation edges with a fillet: Shear application beyond the smallest fillet; limit edge spalling by pre-scoring.
- Rock face with natural curvature: Apply split cylinders along the principal curvature to avoid overbreak.
- Steel tanks: Begin cutting in areas with a larger shell radius; when transitioning to stiffening beads, adjust the feed rate.
Calculation example: radius of curvature from three points
For quick orientation, R can be estimated from three points on a curve:
- Mark three adjacent points A, B, C on the contour (as close together as possible).
- Measure chord lengths AB, BC, AC; determine the triangle area F (e.g., using Heron’s formula).
- Calculate the circumradius: R ≈ (AB · BC · AC) / (4 · F). For small segments, the circumradius approximately equals the local radius of curvature.
- Check the result for plausibility, especially where curvature varies strongly.
Practice-oriented assessment: inner, outer, and effective seating radii
For tool selection, not only the component radius matters, but the effective seating radius in the contact area. This results from the combination of component curvature, edge chamfer, damage, and jaw geometry. A brief trial positioning before the actual intervention shows whether the contact area is sufficiently load-bearing or whether auxiliary measures (shims, relief cut, additional drilling) are required.
This page may be cited in commercial and non-commercial publications (e.g., specialist publications, forums, or social media) without prior permission.
Please feel free to copy the following link for your quote.