


The installation height determines whether hydraulic separation and splitting technology can be used safely in confined spaces. In deconstruction, gutting works, rock breakout and tunnel construction it defines the free working space beneath ceilings, between utilities or in shafts. Teams working with concrete demolition shear, hydraulic rock and concrete splitters or hydraulic cylinders plan the installation height early on – otherwise collisions, inefficient workflows or additional separation cuts may occur. Early coordination of the vertical working envelope improves productivity, shortens set-up cycles and reduces rework.
Definition: What is meant by installation height?
Installation height is the required vertical clearance to bring a device, tool or power unit into working position and operate it safely. It includes the component itself and all functional allowances such as lift, opening or swing paths, hose bends, connections, as well as the necessary operating and safety zone. In contrast to the overall height (pure device dimension), the installation height reflects the actual working condition – for example the jaw opening of a concrete demolition shear or the extension path of a stone splitting cylinder. In planning practice, a conservative buffer is recommended to account for tolerances, protruding reinforcement and dynamic movements.
- Elements of installation height: device height in working position, movement envelopes (opening, stroke, rotation), minimum bend radii of hoses and cables, coupling space, operator access and safety distance.
- Interfaces: allowance for quick couplers, protective guards and shims or support plates.
Relevance of installation height in demolition and deconstruction
In the application areas of concrete demolition and special demolition, gutting works and cutting, rock breakout and tunnel construction, natural stone extraction as well as special operations, installation height is a key criterion for selecting attachments and handheld tools. Ceilings, beams, cable trays, ventilation ducts and sprinkler systems limit the clear headroom. This results in requirements for shear geometry, cylinder stroke, hose routing and the position of hydraulic power packs. Careful planning prevents collisions, reduces rework and increases occupational safety. Where digital as-built data or scans are available, clash checks of the working envelope against surrounding structures add robustness and support compliance with project and safety requirements.
Installation height for hydraulic systems and cutting tools
Hydraulic systems require additional free space for movement and energy supply beyond the pure device geometry. This particularly applies to:
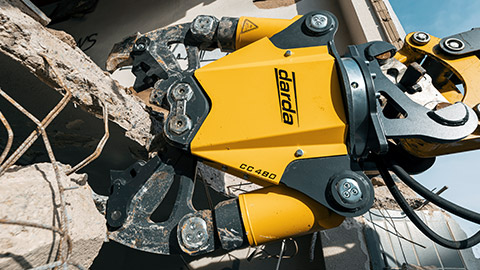
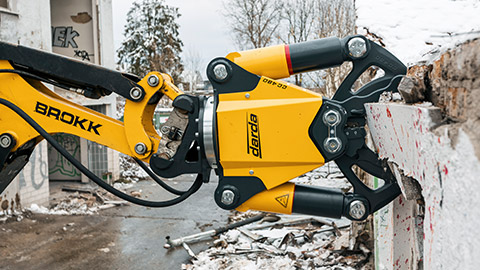
Concrete demolition shears
For concrete demolition shears, the installation height is the sum of the shear body, the required jaw opening for the component cross-section, any rotational clearance and operator stand-off. Beams and brackets are of particular importance, as swinging open the shear jaws requires additional space. Too little installation height can restrict the attachment position, reduce leverage and increase the number of required bite points. A tangible safety allowance above the maximum jaw opening helps to accommodate tolerances, aggregates breaking out of the edge and reinforcement hooks.
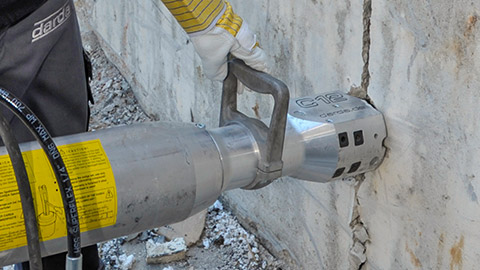
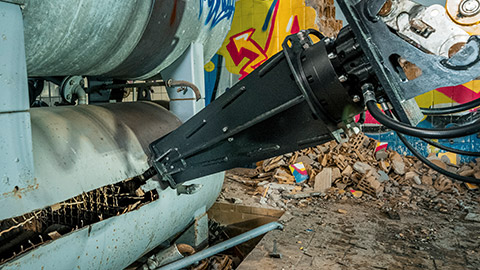
Stone and concrete splitters
For stone splitting cylinders and concrete splitters, cylinder length, insertion depth into the borehole and the extension path determine the installation height. Added to this are the bend radii of the hydraulic hose line and the position of the reaction base. In shafts or under low ceilings, cylinders are often guided horizontally or set in alternating drill patterns to minimize vertical installation height. Avoid tight S-bends in hose runs; use gentle arcs and, if necessary, swivel fittings to keep the vertical profile low.
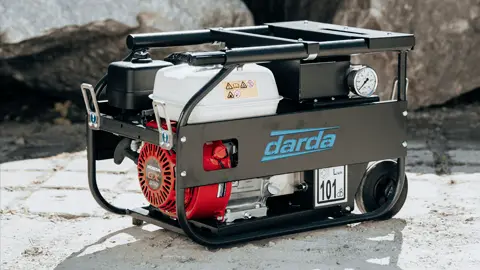
Hydraulic power packs
Hydraulic power packs themselves indirectly influence the installation height at the work location: for example compact hydraulic power units require footprint, air supply and service access. The hose routing from the energy source to the shear or cylinder must be realized without tight bends (at least the specified bending radius) so that no additional height is created by makeshift deflections. Sufficient free space for cooling-air intake and exhaust airflow as well as safe hose lead-ins prevents heat build-up and tripping points.
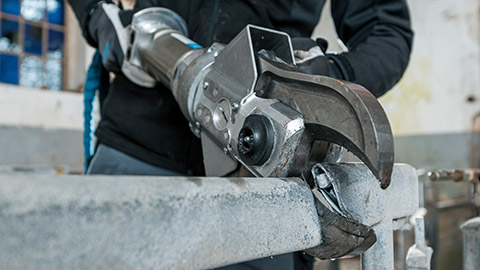
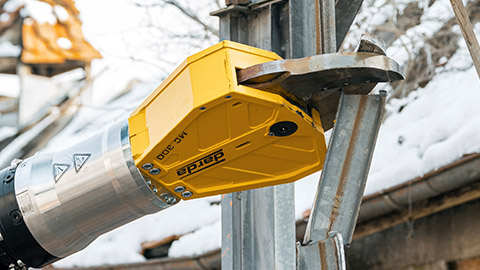
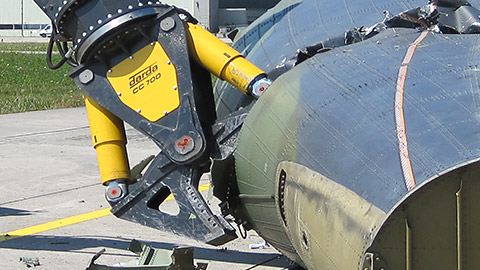
Other tools
With multi cutters, steel shears and tank cutters, installation height depends on opening and swing path, the necessary distance to sparks or chip ejection, as well as the space required for protective measures. In pipe racks and between steel beams, installations limit the degrees of freedom, so installation height is often the decisive selection criterion. Direction of cut and shield positioning should be coordinated to maintain the protective distance even where headroom is tight.
Determination, measurement and documentation of installation height
Correct determination of installation height combines as-built survey on site with the equipment data.
- Measure clear room height: consider shell height, finished ceilings, suspended systems, temporary installations.
- Record component thicknesses and cross-sections: concrete thicknesses, reinforcement zones, masonry courses, natural stone blocks.
- Add movement allowances: jaw opening, lift and extension paths, swing and tilt angles, hose bends.
- Plan safety distance: operator area, rebound, spalling, emergency-stop zone.
- Create documentation: sketch with elevation benchmarks, obstacles, setup and escape routes.
- Account for deflection and tolerances: slab sag under load, scaffold settlement, uneven floors and borehole deviations.
- Verify unit consistency and references: define zero levels, datum lines and measurement method for reproducibility.
Typical situations and practical examples
Installation height varies greatly depending on the field of application:
- Concrete demolition and special demolition: Beams and cable trays often reduce clearance to under two meters. Concrete demolition shears are guided with a shallow approach strategy and smaller opening angles; additional intermediate cuts reduce the required jaw opening.
- Gutting works and cutting: In existing buildings, low ceilings meet dense installations. Stone and concrete splitters benefit from horizontal drill patterns to get by with a small stroke.
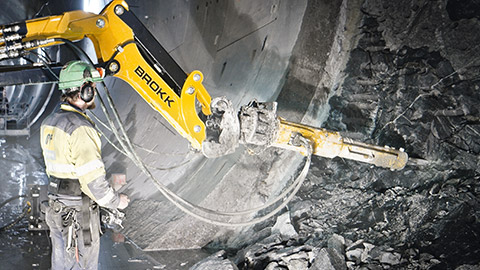
- Rock breakout and tunnel construction: In drifts, lining, anchors and ventilation define installation height. Cylinders are guided compactly, power packs positioned outside the bottleneck.
- Natural stone extraction: Along quarry faces and bedding joints, installation height often only permits short cylinders. Several small splitting points replace one large stroke.
- Special operations: In tanks, shafts or under a machine foundation, low installation heights are common. Short tools, flat hose runs and modular setups pay off here.
- Bridge and slab rehabilitation: Falsework, formwork ties and traffic management reduce headroom; compact tools and staged cuts maintain clearances.
- Industrial plants and process areas: Dense MEP services constrain the working envelope; hose routing and shielding must be planned to avoid hot spots and ignition sources.
Installation height in combination with drill pattern and splitting strategy
When splitting concrete or natural stone, installation height influences the drill pattern. Small heights favor tighter, horizontally oriented rows of boreholes so that the required cylinder stroke remains small. Where installation height is limited, splitting wedges are placed at staggered intervals to propagate the break in a controlled manner. An overly long extension path with little clearance increases collision risk, especially at slab edges. In practice, hole diameter, spacing and effective stroke act together – reducing stroke and spacing typically lowers the vertical requirement while maintaining crack guidance.
- Short stroke strategy: increase hole count and guide the break in several stages.
- Staggered rows: offset boreholes to use natural planes of weakness and minimize height conflicts.
- Edge protection: maintain a buffer to avoid breakout that would further reduce headroom.
Distinction: installation height, overall height, stroke height and jaw opening
These terms are often mixed in everyday use. For planning, a clear separation is worthwhile:
- Overall height: device dimension in the idle state.
- Stroke height: maximum travel of the cylinder or extension path.
- Jaw opening: opened span of shears.
- Installation height: sum of device, movement, hose bends and safety allowances in the real working situation.
Only the installation height reflects the operational clearance. It should be the binding reference in method statements and coordination drawings.
Planning guide: selection based on installation height
The following approach has proven itself where installation height is limited:
- Record component and environment: clear space, obstacles, escape routes.
- Define the task: crushing, splitting, cutting, separating.
- Select the tool family: concrete demolition shear for massive cross-sections; stone and concrete splitters when a clean, controlled crack with minimal equipment build-up is required.
- Calculate movement allowances: opening angle, stroke paths, hose routing.
- Check alternatives: horizontal application, a smaller shear with more bite points, shorter cylinders with a denser drill pattern.
- Clarify logistics: location of hydraulic power packs, hose lengths, service access.
- Validate on site: perform a dry run or mock-up, confirm clearances and update documentation if boundary conditions change.
Safety and ergonomics with low installation height
A few centimeters of clearance raise the requirements for guidance and surefootedness. The following points are relevant in practice:
- Stable body posture and non-slip footing.
- No forced bend radii on hoses; avoid pinch and shear points.
- Shielding against spalling and falling material, especially overhead.
- Caution with rebound after the splitting process; keep the work area clear.
- Observe general requirements and manufacturer specifications; always plan operations appropriate to the position.
- Adequate illumination and clear signaling, especially for overhead or confined tasks.
- Use anti-kink protection and secure hose whips; inspect couplings before each operation.
Installation height and work quality
Too little installation height can impair intervention quality: unfavorable shear angles lead to larger residual cross-sections, unfavorable cylinder positions to an uneven split line. With additional intermediate cuts, smaller jaw openings and precise positioning, quality can be ensured even with little clearance. Correct alignment also reduces tool wear, vibration and noise emissions, supporting consistent results over longer shifts.
Logistics: feed and setup routes
Installation height does not begin at the component. Doors, staircases, elevators and shafts define the transport route. Modular components, short cylinders and decoupled hydraulic power packs facilitate access. Clean routing of the hydraulic hose line reduces the required height at the work location and decreases tripping hazards. Turning radii on landings, intermediate storage points and rigging options for lifting across thresholds should be factored into the setup sequence.
Optimization strategies for limited installation heights
- Select a smaller tool and work with more attachment points.
- Apply cylinders horizontally or diagonally to save stroke height.
- Stagger drill patterns more tightly; reduce extension path.
- Create intermediate cuts to reduce jaw openings.
- Place power packs remotely; test hose runs in advance.
- Temporarily remove (after approval) or protect obstacles.
- Use low-profile or swivel fittings to flatten hose arcs in the vertical envelope.
- Pre-assemble modular subassemblies to minimize handling height at the point of work.
Documentation and approvals
Before use, documented approval of installation-height planning is recommended: dimensions, photos, sketches and the intended tool configuration. This supports coordination with site management, occupational safety and the executing teams – especially in special operations and overhead work. Legal requirements may vary by project; the applicable regulations and the relevant manufacturer specifications of Darda GmbH are authoritative. A formal sign-off process with version control ensures that updates from site inspections are traceable and implemented consistently.
- Typical attachments: dimensioned elevations and sections, obstacle register, risk assessment, setup and escape route plan, tool data sheets and maintenance status.
- Evidence of verification: measurement logs, mock-up photos and acceptance notes from coordination meetings.
This page may be cited in commercial and non-commercial publications (e.g., specialist publications, forums, or social media) without prior permission.
Please feel free to copy the following link for your quote.