


Drill bits are key tools in professional concrete demolition, controlled rock cutting/processing, and natural stone extraction. They create the boreholes required for subsequent cutting and splitting processes – such as for the use of hydraulic rock and concrete splitters or for precise finishing with concrete crushers. In combination with hydraulic power units and other hydraulic tools from Darda GmbH, drill bits form the basis for a predictable, low-vibration, and material-appropriate working method that has proven itself in building gutting, special demolition, tunnel construction, and special operations. Correct bit selection and guided drilling improve productivity, extend tool life, and protect the base material.
Definition: What is meant by a drill bit?
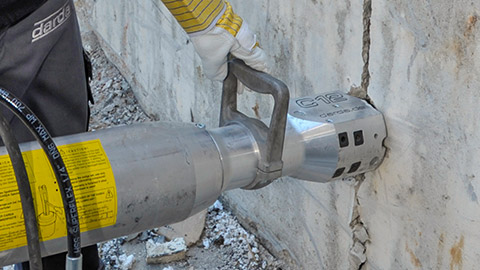
A drill bit is the foremost tool on the drilling system that converts the mechanical energy of impact and rotation into rock or concrete fragmentation. Depending on the design, this is achieved via carbide cutting edges, button inserts, or cutting plate geometries that remove, chip, or crush material. In percussive-rotary drilling, the bit repeatedly impacts while rotating; in rotary-only applications, the cutting action predominates. Drill bits are used in various diameters, shank systems, and geometries to produce boreholes for anchors, separation cuts, wedges, or splitting cylinders. Dimensional accuracy, coaxial guidance, and appropriate tolerances are decisive for downstream splitting and finishing quality.
Design and mode of operation of drill bits
A drill bit transfers impact energy and torque to the tip. Critical factors are the material (usually tempered steel), carbide outfitting, and cutting geometry. Common versions include two- and four-cutter heads for reinforced concrete, cross- or X-shaped heads for precise true running, and button bits for hard rock. Flushing channels remove dust or drill cuttings, either dry with extraction or wet with water. The shank connection (e.g., SDS-Plus, SDS-Max, hex for pneumatic hammers, or tapered shanks in rock drilling) provides a positive-fit coupling to the drive unit and influences the transmittable impact energy as well as guidance in the borehole. Quality of the carbide brazing and the integrity of solder joints further determine resistance to impact shocks and thermal cycling.
- Two-/four-cutter heads: balanced drilling in reinforced concrete, improved guidance when contacting rebar.
- Cross/X heads: accurate start and minimal walking for precise hole placement.
- Button bits: robust inserts for massive rock with high compressive strength.
- Flushing concept: internal or external, matched to dust class, debris size, and cooling needs.
Drill bits in combination with stone and concrete splitters
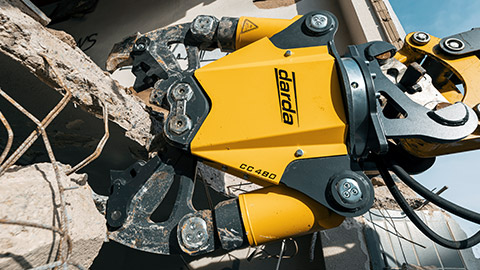
For stone and concrete splitters to introduce force safely and in a controlled manner, boreholes must offer dimensional accuracy, sufficient depth, and a suitable surface quality. Typical drilling diameters are matched to the respective wedge or cylinder unit; in concrete and hard rock, medium diameters on the order of several centimeters are common. Straight, aligned boreholes improve force introduction and reduce unintended breakout. The roughness of the hole wall supports frictional interlock, whereas excessive breakout at the hole edge can lead to edge spalling. After the splitting operation, residual fins, edges, or local compaction can be removed in a material-appropriate way with concrete pulverizers until the desired contour is achieved.
Before inserting splitting devices, clean the borehole, verify diameter with a gauge if required, and deburr the hole mouth. For serial splitting, consistent hole depth using a depth stop reduces variance in crack initiation and shortens cycle times.
Applications: from concrete demolition to natural stone extraction
Drill bits are present in all phases of a controlled cutting and deconstruction process: from laying out the drilling pattern and splitting to precise finishing. They connect the preparatory work for hydraulic tools with the requirements of structural analysis, safety, and emission control. Proper sequencing, documentation, and quality checks ensure reproducible results and compliance with project constraints.
Concrete demolition and special demolition
In reinforced concrete, boreholes are placed to weaken sections, insert splitting cylinders, or create defined predetermined breaking lines. When drill bits hit reinforcement, four-cutter geometries help maintain true running. Reducing feed and rotation at rebar contact limits carbide chipping and preserves hole geometry. After the splitting operation, concrete pulverizers selectively separate residual concrete from the reinforcement without causing large-area damage to the remaining structure.
Interior strip-out and cutting
In interior areas, low vibration as well as dust and noise reduction are central. Drill bits create defined lines of holes for later cuts or as breakout aids before using Multi Cutters or combination shears. Water or vacuum flushing reduces fine dust, and a well-planned drilling pattern minimizes rework. Compact drilling rigs and coordinated hydraulic systems further contribute to low-emission work in confined spaces.
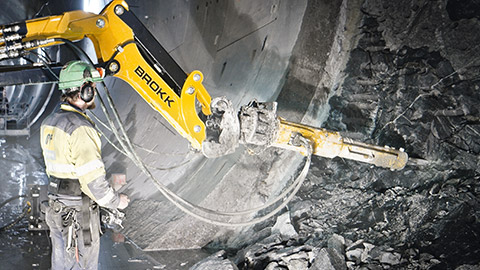
Rock breaking and tunnel construction
In rock, drill bits are used to create rows of holes along desired fracture lines. In massive rock types, buttoned heads with high impact energy are common. Straight drilling and adjusted hole spacing ensure that stone splitting cylinders introduce stress correctly and fractures propagate along the planned line. A stable collaring point and early alignment prevent walking on uneven or weathered surfaces.
Natural stone extraction
When extracting natural stone blocks, drill bits are guided to utilize natural bedding planes and joints. Precise drilling patterns enable clean release of large pieces; splitting devices are then used for separation, and tong tools optimize the block geometry. Stop holes at line ends help limit crack propagation and protect the target block.
Special applications
In sensitive areas, with limited access, or complex material composites, drill bits enable safe preparation: for example, for setting smaller pilot holes, relieving stresses, or creating access openings before tank cutters, steel shears, or other special tools are used. Stitch drilling with small diameters can provide controlled openings where cutting is restricted.
Selection criteria and sizing
Choosing the right drill bit is essential for efficiency, tool protection, and result quality. The following factors have proven effective:
- Substrate: Compressive strength, rock type, grain size, moisture, and abrasiveness determine geometry and carbide grade.
- Degree of reinforcement: Four-cutter or cross-shaped heads run truer in reinforced concrete and reduce catching on rebar.
- Diameter and length: Matched to the splitter or cylinder unit; sufficient length for the planned splitting depth.
- Shank system: Compatible with the machine (SDS-Plus/-Max, hex, tapered) and the required impact energy.
- Flushing/extraction: Dry extraction or wet flushing for dust and temperature control.
- Edge and axial distances: Sufficient distance to edges, joints, and embedded components for predictable fracture lines.
- Emission targets: Requirements for noise, dust, and vibrations influence the drilling strategy and tool selection.
- Machine power class: Impact energy, blow frequency, and spindle interface must suit bit diameter and material.
- Hole tolerance and straightness: Tighter tolerances improve splitter fit and reduce unintended breakout.
Drilling strategies and parameters
The interplay of impact frequency, rotation speed, and feed determines drilling progress and hole quality:
- Feed: Even, without bogging down the machine. Excessive pressure increases heat and wear.
- Rotation speed/impact energy: Adapt to material hardness and diameter; in hard rock, use lower speed and higher impact energy.
- Chip evacuation: Regularly withdraw from the borehole to remove cuttings; reduces friction and heat spikes.
- Cooling/wetting: Water reduces dust and thermal load on the cutting edges.
- Step drilling: For large diameters, pilot first, then enlarge; improves guidance and true running.
- Straight guidance: Align early and avoid skewing; essential for splitting processes with stone and concrete splitters.
- Collaring: Start on a flat, non-skid spot or use a guide bushing to prevent walking.
- Rebar contact: Reduce feed and rpm when crossing reinforcement to protect cutting edges.
Drilling pattern for controlled cutting and splitting
A coordinated drilling pattern transfers the subsequent splitting energy in a targeted manner into the component or rock:
- Define line path: Consider the course of edges, joints, reinforcement, and embedded components.
- Define hole spacing: Varies with material and splitting force; uniform spacing increases predictability of the fracture line.
- Edge distances: Keep sufficient distance to free edges to minimize breakout.
- Depth/penetration: Splitting depth and required energy determine the necessary borehole length.
- Quality control: Check straightness, diameter, and cleanliness before inserting splitting cylinders or wedges.
- Offset drilling: Use staggered rows in thick components to steer crack propagation and reduce peak loads.
A well-planned drilling pattern reduces rework and speeds up subsequent processes with splitting tools, concrete pulverizers, or combination shears. Marking and numbering of holes support traceability and structured execution.
Tool care, wear, and service life
Drill bits achieve their service life when geometry, temperature, and guidance are right. Typical measures include:
- Visual inspection: Detect chipped carbide, edge wear, cracks, or bent shanks early.
- Cleaning: Remove abrasion and dust from drill bit and shank surfaces; improves power transmission.
- Temperature control: Avoid heat build-up through evacuation, flushing, and work breaks.
- Resharpen/renew: Dull cutting edges accelerate wear on the machine and tool; replace in time.
- Storage protection: Store dry and protected from corrosion; clear labeling for diameter and field of use.
- Shank care: Apply appropriate shank grease where specified by the system and keep interfaces free of debris.
- Dimensional checks: Monitor diameter and roundness to maintain hole tolerances.
Safety, dust and emission control
Drilling generates dust, noise, and vibrations. A coordinated protection strategy improves workplace quality and the precision of subsequent work:
- Dust management: Extraction or wet drilling to reduce fine dust.
- Noise control: Coordinate working hours, add sound insulation, and use appropriate hearing protection.
- Hand-arm vibrations: Consider machine selection, break management, and ergonomic handling.
- Utility/rebar detection: Only pre-drill after checking for concealed services and load-bearing elements.
- Support and fixation points: Secure seating and fixation of the machine prevent skewing and kickback.
- Slurry handling: Capture and dispose of drilling slurry in accordance with local environmental requirements.
- Site logistics: Ensure lighting, cord/hose management, and controlled access to the work zone.
Interfaces to other tools by Darda GmbH
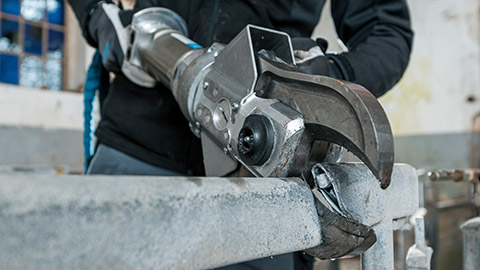
Drill bits prepare the area for hydraulic cutting and gripping processes. After drilling, stone and concrete splitters can be used for controlled separation, followed by precise finishing with concrete pulverizers. In steel and hybrid structures, combination shears, steel shears, or Multi Cutters take over separation of metallic inserts. Hydraulic power packs supply the required energy for these tools, while carefully planned drilling patterns increase the efficiency of the entire process chain. Consistent diameters and aligned boreholes reduce load peaks in the hydraulic system and improve splitting predictability.
Typical failure patterns and how to avoid them
Recurring issues can be minimized through planning and control:
- Drill walking: Set a pilot hole, mark accurately, and guide the machine steadily.
- Overheating: Evacuate regularly, use flushing, reduce feed.
- Hole breakout: Observe edge distances, adjust impact energy, optimize the drilling pattern.
- Jamming: Remove cuttings, do not “force” the bit at the end of the hole.
- Incompatible diameter: Match the drill bit consistently to the splitter or shear.
- Carbide spalling: Reduce rpm and feed at rebar contact and avoid dry running in hard aggregate.
- Oval or oversized holes: Replace worn bits and verify guidance before continuing work.
Practical work steps
- Analyze the existing structure: clarify material, reinforcement, joints, edges, and accessibility.
- Select the drill bit: geometry, shank system, diameter, and length matched to the goal.
- Define the drilling pattern: plan line path, spacing, depth, and emission strategy.
- Drill: with controlled parameters, flushing/extraction, and recurring quality checks.
- Split/cut: use stone and concrete splitters; then form the contour with concrete pulverizers and additional tools.
- Finish: clean edges, relieve residual stresses, inspect the surface.
- Documentation: record procedure and results, apply insights to subsequent areas.
- Debris and slurry management: remove cuttings, capture slurry, and dispose of waste in line with site requirements.
This page may be cited in commercial and non-commercial publications (e.g., specialist publications, forums, or social media) without prior permission.
Please feel free to copy the following link for your quote.